
Guides & videos
Mapping — survey parcels and paths
In short: this is where you draw the geometry of your domain. There are two kinds of line:
- a Path — a line: access road, ride, boundary you walked;
- a Plot — a closed area.
Before you start: a domain must be selected in the banner. Otherwise the app replies "Select a domain before starting a new recording."
Method 1 — record a track by walking
This is the field method: you walk along the boundary and the app drops a point at regular intervals.
- Open Mapping and tap New to create a track.
- Enter the Name, optionally a Description, and choose the Track type (Path or Plot).
- Tap From GPS, then Start.
- Walk. The Active track panel shows the sampling interval and the number of points already recorded.
- Pause stops recording points without ending the track (a crossing, a lunch break). Resume starts again.
- Tap Stop when you are done.
Which interval should you choose? Settings ▸ Mapping ▸ Recording interval, from 5 to 30 seconds.
| Interval | Suitable for |
|---|---|
| 5 s | winding boundaries, small parcels, slow progress through undergrowth |
| 10 s | everyday use |
| 20–30 s | long straight access roads, travelling by vehicle |
What the app does with your points when you stop
When you tap Stop, the line is cleaned up automatically:
- outliers — points whose GPS accuracy dropped sharply, under dense canopy or at the foot of a slope — are discarded;
- redundant points — two points too close to each other to be told apart given their accuracy — are merged into one.
You therefore get a shorter, cleaner line than the raw one. This is intended.
Method 2 — draw a parcel by hand
Useful from the office, on satellite imagery, when boundaries are visible: forest edges, felling areas, paths.
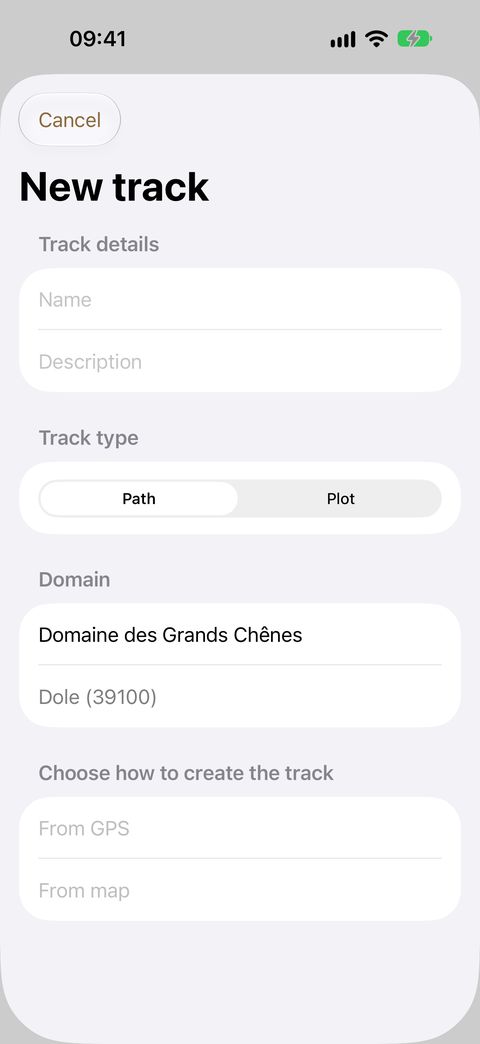
- New track: enter the name and type, then From map.
- The editor opens on an empty map: "Add a point to get started."
- Switch to Edit mode, then place and move your points.
- Validate.
Correct an existing line
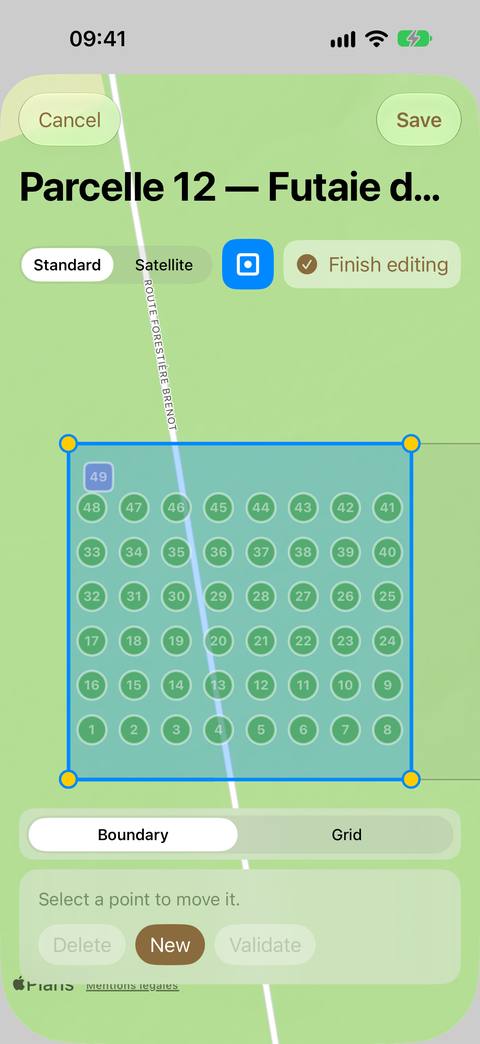
Tap Preview in the track list — or tap a parcel directly on the map at the top: the smallest parcel under your finger is the one that opens.
In the editor:
| Action | How |
|---|---|
| Move a point | Select it, then drag it. The map is locked while you drag, so the background does not move under your fingers. Deselect it to get zoom and panning back. |
| Add a point | Select the preceding point, then New. The point appears in the middle of the next segment. |
| Delete a point | Select it, then Delete. |
| Check survey quality | Show accuracy: each point shows the GPS accuracy it was recorded with. |
| Change the background | Standard or Satellite. |
One valuable aid is displayed in the background, without being editable: the neighbouring parcels in the same domain — you draw a boundary while seeing the adjoining ones, with no overlap and no gap.
Lay out a grid in a parcel — prepare your measurement points
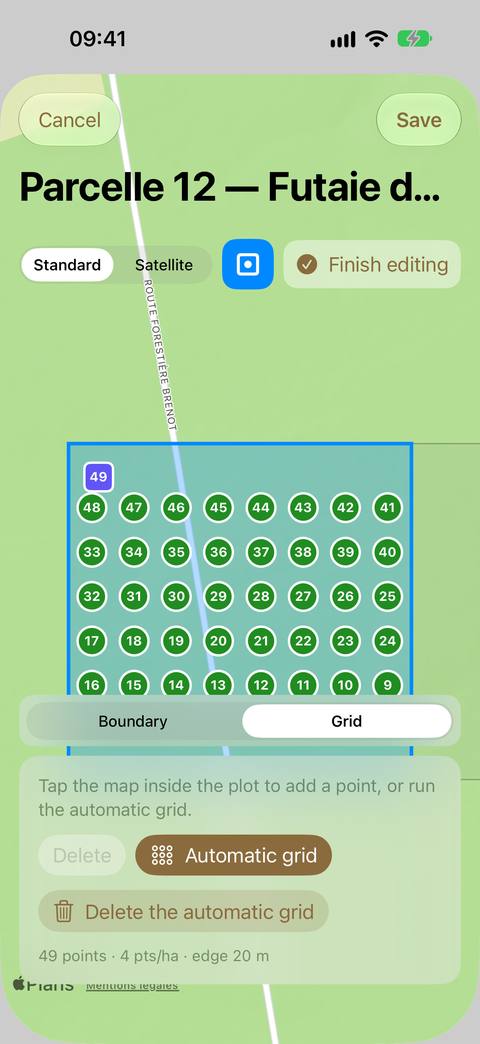
The grid places reference GPS points inside a parcel: the spots where you will come back to measure (inventory plots, survey points). Once they are placed, the Compass guides you to them.
Open the parcel (Preview), switch to Edit mode, then choose Grid in the Boundary | Grid selector. This selector only appears for a parcel with at least 3 points: a path has no grid.
The automatic grid
Tap Automatic grid: the app computes evenly spaced points inside the parcel, based on your settings in Settings ▸ Grid (see the Settings guide):
- Grid per plot? — Yes (default): the parcel gets its own grid. The number of points follows the density (for example 4 points per hectare: 12 points on 3 ha), and no point is placed closer to the boundary than the chosen edge distance (20 m by default). The grid aligns with the shape of the parcel.
- Grid per plot? — No: a single grid for the whole domain, starting from the domain location, is cut by the parcel. The points of two neighbouring parcels are then aligned on either side of their boundary. Only the density applies; the edge distance does not.
The points are numbered M01, M02… in an order that forms a route: you walk them row by row, back and forth, without retracing your steps. The calculation takes one to two seconds on a large parcel.
If the calculation fails, the app tells you why: "Plot too narrow for an edge distance of 20 m.", "Set the estate's location to use an estate grid."… The existing grid is then left untouched.
Adjust by hand
| Action | How |
|---|---|
| Add a point | Tap the map inside the parcel. Outside the parcel, the point is refused ("Outside the plot: point refused."). |
| Move a point | Tap it to select it, then drag it. If you drop it outside the parcel, it goes back to its place. |
| Delete a point | Select it, then Delete. The other points keep their number. |
The markers can be read at a glance: circle = automatic point, ringed circle = automatic point you have moved, square = point added by hand, orange = point outside the parcel or too close to the edge (after the boundary has been changed).
Run again or delete the automatic grid
- Running the automatic grid again replaces all the automatic points — including those you have moved. Points added by hand are kept. The app asks you to confirm and tells you how many points go and how many remain.
- Delete the automatic grid removes all the automatic points and keeps the points added by hand, with their number. Here too, you are asked to confirm.
As with the boundary, nothing is saved until you tap Save: Cancel discards everything.
Read the track list
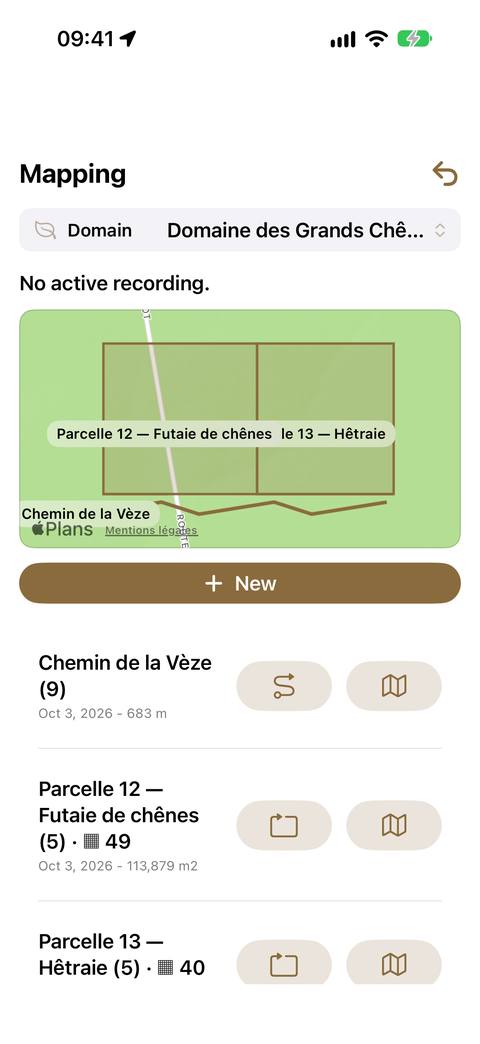
Each row shows:
- the name followed by the number of points in brackets — the density of your survey; for a parcel with a grid, the number of grid points after the ▦ symbol (
Plot A (5) · ▦ 12); - the type (Path or Plot);
- the date of the last change;
- the measurement: a length in metres for a path, an area for a parcel.
The area is shown in the unit chosen in Settings. In hectares, it is given the forestry way: 2 ha 34 a 17 ca.
Good to know
- Changing the type afterwards is possible: a line surveyed as a path can become a parcel, and vice versa, without losing its points.
- A parcel is closed and usable only from 3 points. Below that, it will not be displayed and will not be used for automatic filing.
- The track being recorded cannot be deleted: stop it first.
- Deleting a track erases all its GPS points — the app asks you twice.
- The list and the map only show the tracks of the active domain.
What next
- Enter your observations — they will now be filed on their own.
- Reach your grid points with the Compass.
- Export your mapping to KML to open it in a GIS — and your grid to GPX for a field GPS unit.
- Back to the getting started guide