
Guides & videos
Observations — the field notebook
In a nutshell: an observation is a spot where you stopped. You open it once, then attach whatever you like to it: photos, dictated notes, inventory sheets, basal area counts, soil descriptions.
It is the heart of the app.
The screen
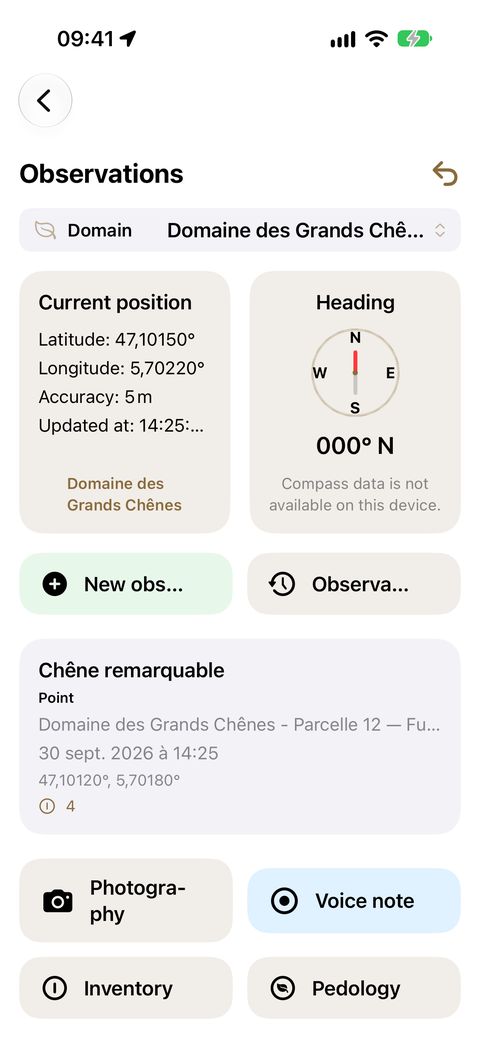
Three areas, from top to bottom:
- The Domain banner — your working context.
- A dashboard: on the left your Current position (latitude, longitude, altitude, accuracy), on the right your Heading. Below the position, the app shows the domain it recognises at this spot — tap it to make it active in one gesture.
- The actions: New observation, Observation history, the current observation, and the enrichment buttons.
Creating an observation
- Go to the spot.
- Check that the displayed accuracy suits you (wait a few seconds if necessary).
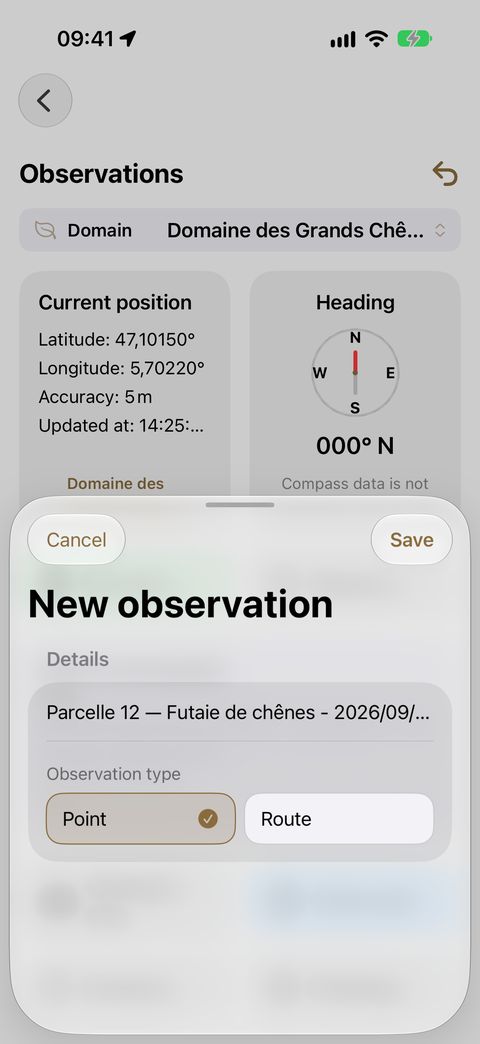
- Tap New observation.
- Choose the type — it determines which actions will be offered:
| Type | For… | Available actions |
|---|---|---|
| Point | a tree, a station, a monitoring point | Photography · Voice note · Inventory · Pedology |
| Route | a walk, a count made by turning on the spot | Photography · Voice note · Inventory · Basal area |
- The title is suggested automatically (parcel or domain name, date, time). Replace it if you prefer.
Creating an observation costs no credit.
Enriching the current observation
All actions apply to the observation displayed in the summary card. To switch to another observation, go through Observation history.
Photography
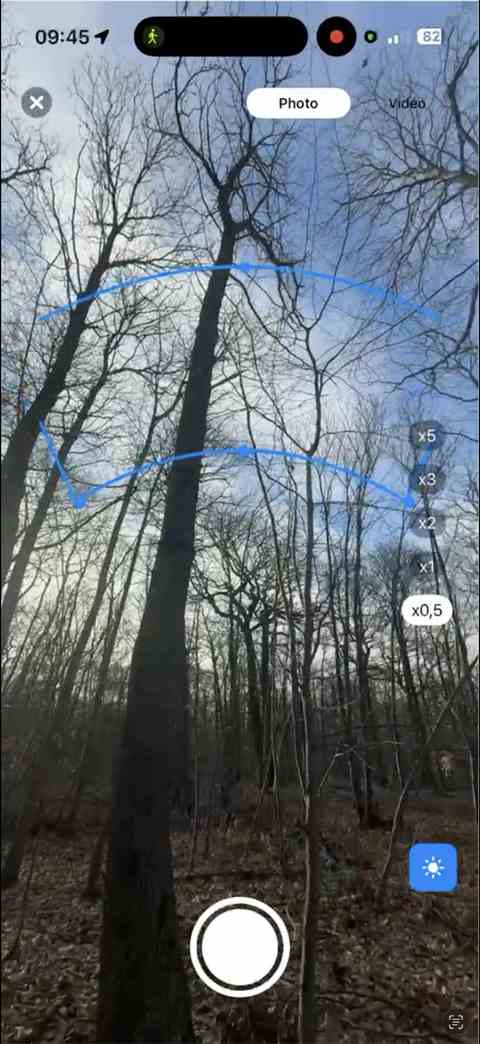
Tap Photography. The preview opens with sighting marks overlaid, including the heading and, if you turn it on, the sun path — handy for judging the exposure of a spot.
After you take the shot, the app offers to add a comment:
- with the keyboard, or
- by voice: the transcription fills in the comment on its own.
Your photos are stored in your iOS photo library, in an album named FA-⟨domain⟩.
Voice note
Tap Voice note to start, tap again to stop. That's all.
The transcription is done automatically on your iPhone, with no network and without your voice going anywhere else. You will find the text in the observation detail, next to the recording.
If you leave the screen during a recording, it is cancelled — nothing runs without your knowledge.
Inventory
An inventory describes one tree. It always starts with a photo: the photo is what vouches for the measurement.
- Tap Inventory. The camera opens straight away.
- Frame the tree between the sighting marks, and shoot.
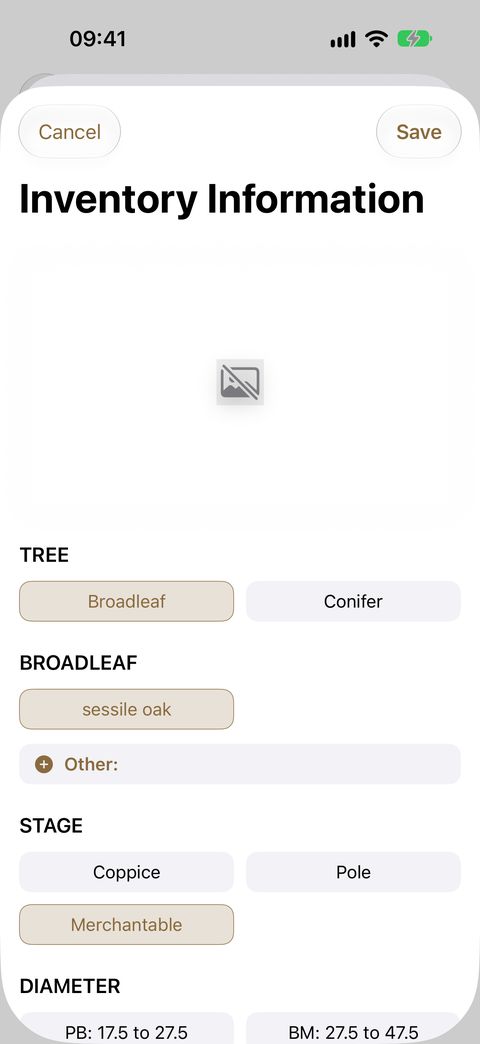
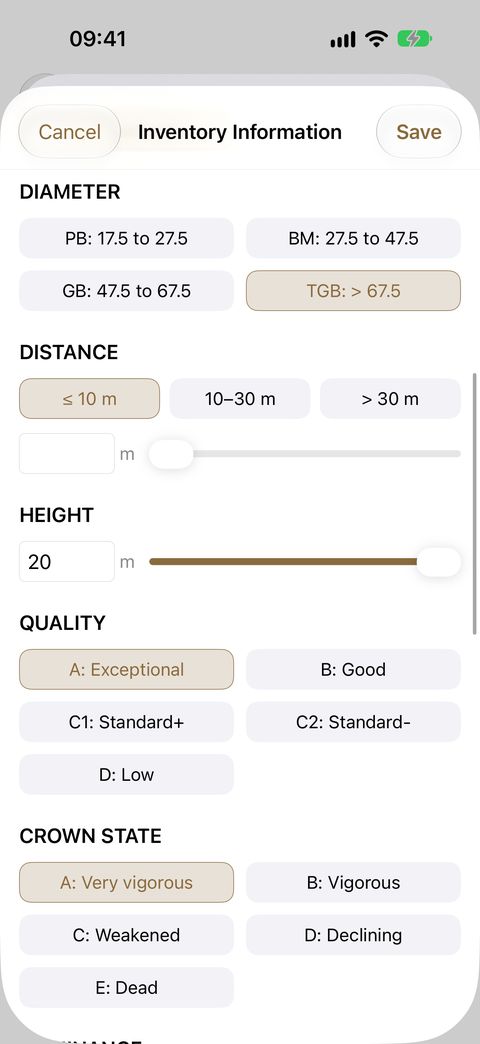
- The Inventory Information screen opens, with the photo attached.
- Fill in whatever is useful to you:
| Field | Content |
|---|---|
| TREE | Broadleaf or Conifer |
| BROADLEAF / CONIFER | the species, chosen from the international reference list |
| STAGE | coppice, pole, merchantable |
| DIAMETER | class: PB, BM, GB, TGB |
| DIAMETER (cm), STEM COUNT | for poles and coppice |
| HEIGHT, DISTANCE | measurements |
| QUALITY | A: Exceptional · B: Good · C1: Standard+ · C2: Standard- · D: Low |
| CROWN STATE, GREEN CROWN | ratings A to E |
| DOMINANCE | dominant, codominant, suppressed |
| OTHER CHARACTERISTICS | future stem, heritage, habitat, twin |
| COMMENTS | free text, or dictated |
Date, time, position and azimuth are recorded automatically.
Cancelling the shot saves nothing and uses no credit.
Basal area
Your iPhone's relascope. Available on routes.
- Tap Basal area.
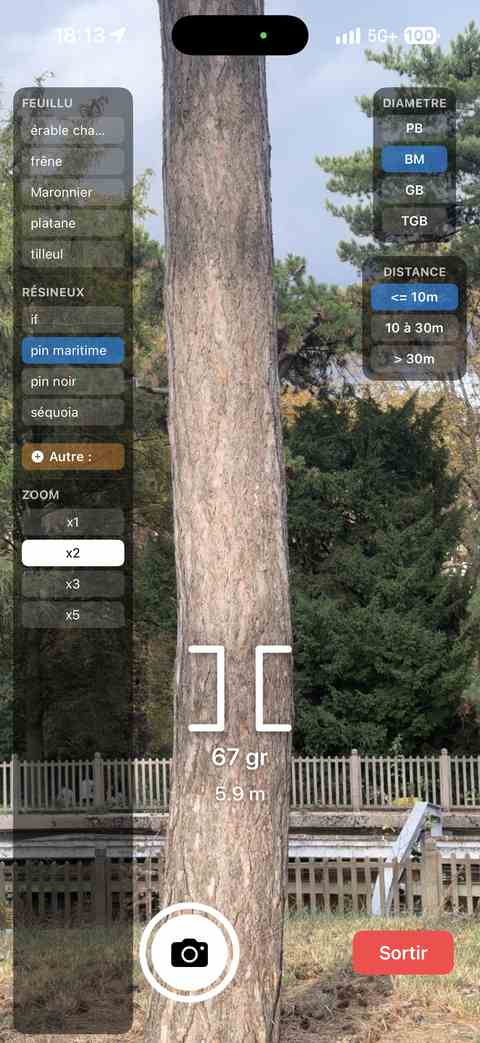
- The camera preview opens with the relascope marks.
- Turn on the spot. For each tree to count, fill in the side panels: the species, the diameter class (PB / BM / GB / TGB) and the distance band (≤ 10 m, 10 to 30 m, > 30 m). Only the band you choose is recorded: the sensor distance shown under the azimuth is a guide only — branches can distort it.
- The azimuth of each tree is recorded without you having to note it.
- Confirm.
The zoom level is always selected when the screen opens: x1 the first time, then the one you chose last — it is kept from one count to the next, even after you quit the app.
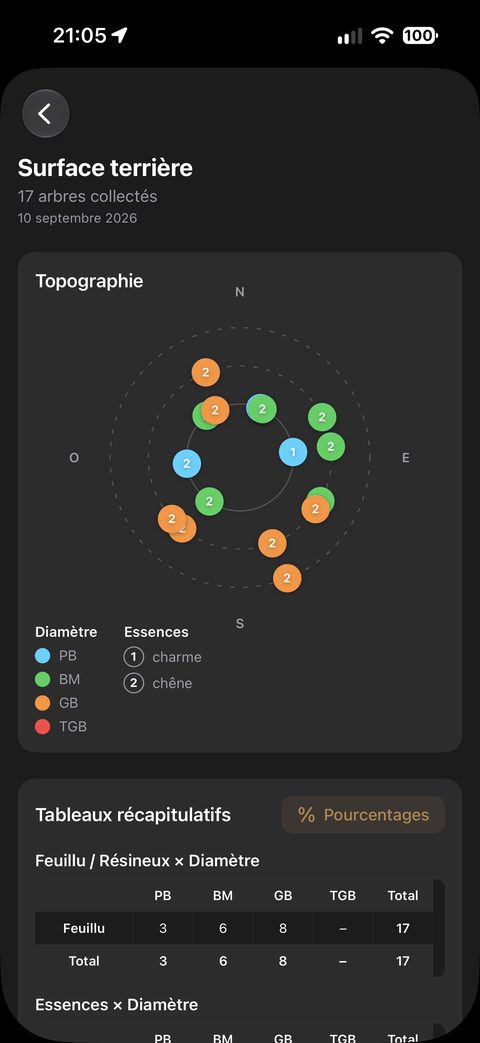
The summary is then displayed:
- a topographic diagram — your trees placed around you, by azimuth and distance, with one colour per diameter class and the cardinal points;
- two cross tables: type × diameter and species × diameter. A button toggles between counts and percentages.
Pedology
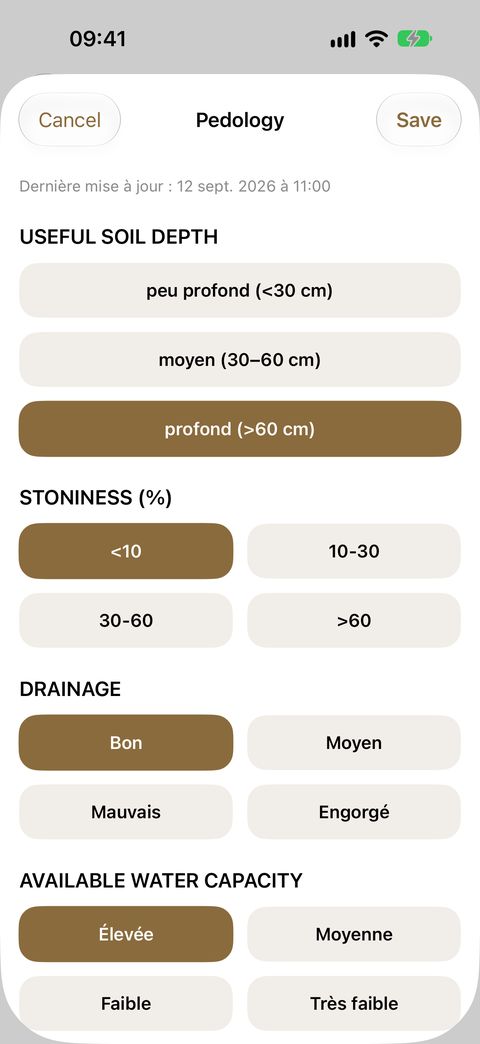
On a Point, describe the soil under seven headings, each with a single choice: depth, stoniness, drainage, water reserve, pH, humus (MOR / MODER / MULL, with their description), biological activity. A voice comment can be added.
Only one pedology record per observation: it describes the soil of the spot.
Finding and correcting your observations
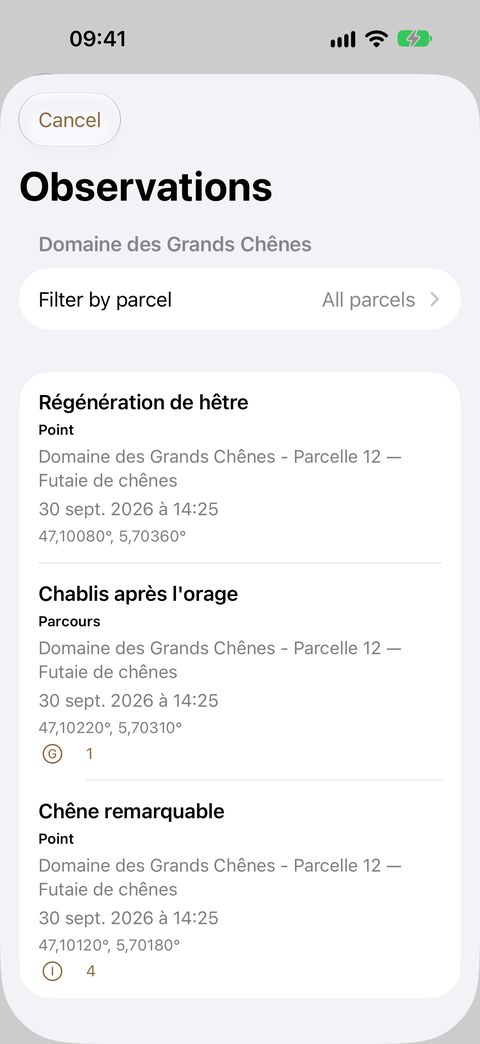
Observation history opens the list. Two filters: by domain, then by parcel — only parcels that actually contain observations are offered. Your filters are kept.
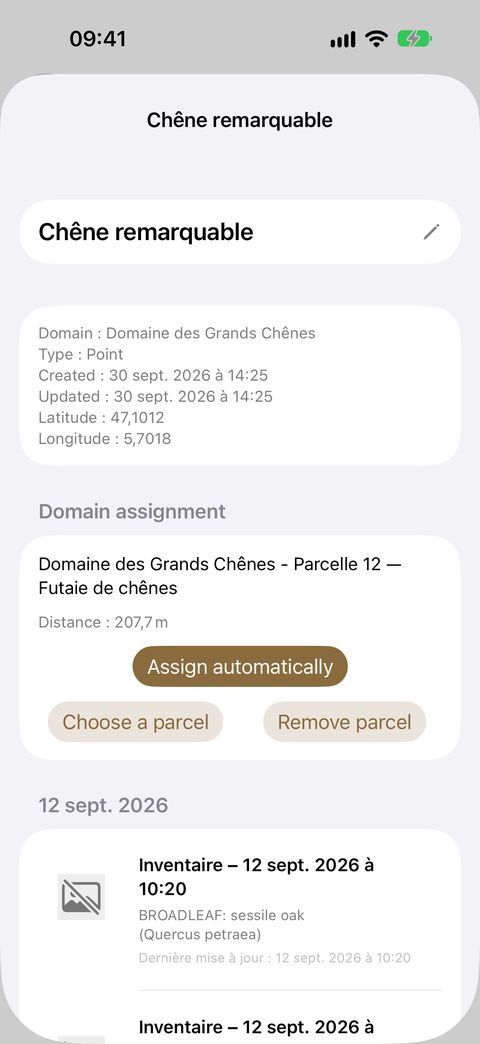
The detail of an observation shows the collected items grouped by date, and lets you:
- reread and edit notes, comments and inventory sheets;
- listen to voice notes and read their transcription;
- correct the assignment: reassign the observation to another domain or another parcel. Domains are offered from nearest to farthest.
Deleting
Deleting an observation also deletes its photos and videos from your photo library — nothing is left behind. If the app cannot delete them (permission denied), the observation is not deleted either: you never end up with orphaned photos.
You can turn off the confirmation prompts in Settings ▸ Observations and Settings ▸ Voice input.
Frequently asked questions
How much does a day in the field cost? Only photography, inventory and basal area use a credit, one each. Creating observations, dictating, describing the soil: free. A day's inventory of 40 trees costs 40 credits.
I missed my photo — have I lost a credit? If you cancel before shooting, no. If the photo is taken and then deleted, the credit is still counted.
Can I record several trees at the same spot? Yes: as many inventories as you like on the same observation, each with its own photo.
Is my basal area count saved if I leave the screen? Always confirm to save it.
I have no credit left — what happens to my work? It remains fully accessible: viewing, correcting, exporting. Only the three paid data-entry actions are suspended.